How to Create a Gaussian Splat of an Area or Object
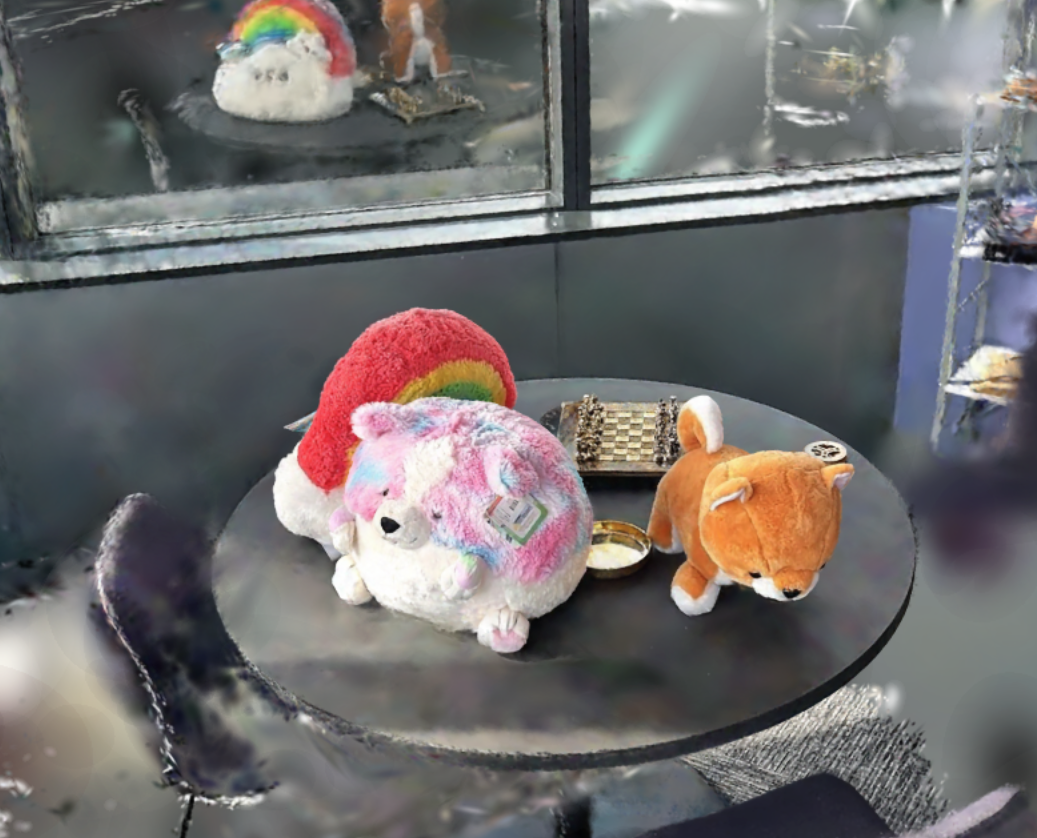
The Niantic Spatial Platform SDK offers a Gaussian splat feature that can produce a Gaussian cloud from a recorded sequence.
For this demo, we will create a Gaussian splat from a recorded sequence and export it to a file.
Prerequisites
You will need a Unity project with the Niantic Spatial Platform SDK installed. For more information, see Set up the Niantic SDK for Unity.
Additionally, you will need to install the Niantic Spatial SDK Scan Reconstruction UPM. Install this package via Unity Package Manager using the same method as the main Niantic Spatial SDK package in the setup guide. Scan Reconstruction is not currently supported on Windows.
Finally, you will need a recorded Raw Scan sequence to use as the input for the Gaussian splat processor. See How to Create Datasets for Playback for instructions to record a Raw Scan sequence.
Using Playback sequences with Scan Reconstruction
Turning an existing Playback sequence into a Gaussian splat is possible with an extra conversion step.
AR Scanning Manager can produce two versions of a scan recording:
- Raw Scan format: By default, AR Scanning Manager will write frames directly to disk.
- This is the format that Scan Reconstruction accepts.
- The files are saved to the directory at
ScanStore.SavedScan.ScanPath. Metadata is stored in .pb files.
- Playback format: Optionally, the recorded frames can be exported to a compressed .tgz archive.
- This is the format that Playback and VPS accept.
- The sequence is archived under
ScanStore.SavedScan.ScanPathin a .tgz. Metadata is stored in a capture.json file.
If you have a Playback recording (a .tgz archive, or an extracted sequence that contains a capture.json) that you wish to use with Scan Reconstruction, the sequence must be converted back into Raw Scan format.
The easiest way to do this is to either use the sample Recording scene or to add on the How to Create Datasets for Playback components to the below scene. Then, run the scene in Playback mode with your Playback sequence set as the Playback Dataset Path in XR Plug-in Management → Niantic Lightship SDK settings → Playback. The AR Scanning Manager will read the Playback sequence and record it back into a Raw Scan recording in the process of running the scene.
After the recording is completed (_arScanningManager.enabled = false), reconstruction of the SavedScan can begin with ProcessSplat().
Add AR Scanning Manager to a Unity Project
To produce a Gaussian splat, create an AR Scanning Manager to read the scan sequence from disk.
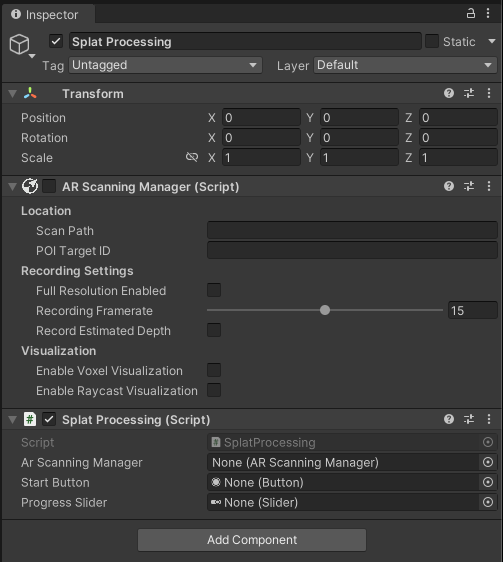
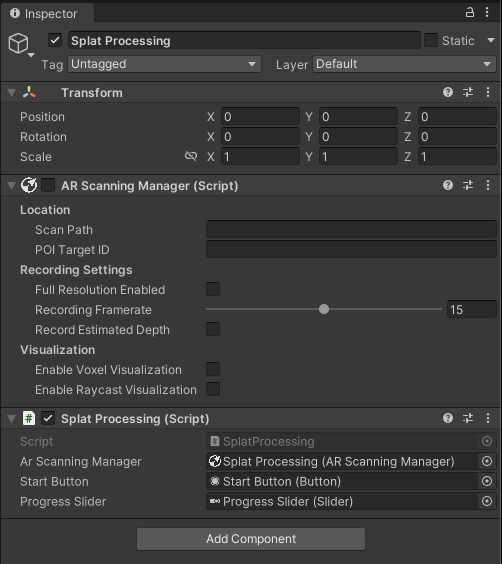
- Create an empty Game Object in the root of your scene. Name it Splat Processing.
- Add an AR Scanning Manager component to the Splat Processing object.
- Enable Full Resolution.
- Set Recording Framerate to 15 FPS.
- Set Near Depth to 0.02 m and Far Depth to 10.0 m (or the maximum distance allowed).
- Disable the manager component so that it does not start recording when the scene starts.
Achieving Scaniverse-level Reconstruction Quality
The first element in producing a splat with Scaniverse-level quality is to use AR Scanning Manager with the recommended settings. The settings used in this document are important for achieving good quality.
- Keep Recording Framerate at 15 FPS.
- Always enable Full Resolution.
- Set the quality level according to the number of training iterations that you want to run. For example,
Lowquality will only run one training iteration.Mediumis the equivalent of tapping Enhance in Scaniverse once to run a second training iteration.HighandVeryHighadd a third and fourth training iteration. - Set Near Depth to 0.02 m and Far Depth to the maximum distance.
The second element is to follow best practices while taking the scan recording.
- Move the camera slowly and smoothly, and capture surfaces from multiple angles.
- If scanning an object, take time to capture the object from all sides.
- Set up scan visualization in the recording scene to make it easier to keep track of what has been captured.
- Watch this video for advice on how to capture a quality scan.
Create and Run a GaussianSplatProcessor
Next, create a script to handle the splat processing.
- Add a New script component to the Splat Processing game object. Name it SplatProcessing.cs.
- Add the following code to find the first recorded sequence and reconstruct it into a Gaussian cloud.
using System;
using NianticSpatial.NSDK.AR.Scanning;
using NianticSpatial.NSDK.Scanning;
using NianticSpatial.NSDK.ScanReconstruction;
using UnityEngine;
using UnityEngine.UI;

public class SplatProcessing : MonoBehaviour
{
    [SerializeField]
    private ARScanningManager _arScanningManager;

    [SerializeField]
    private Button _startButton;

    [SerializeField]
    private Slider _progressSlider;

    private void Start()
    {
        _startButton.onClick.AddListener(ProcessSplat);
    }

    private async void ProcessSplat()
    {
        // Find the first scan saved at the default recording path
        // (To select a specific scan instead, search for its ScanId in the list)
        ScanStore scanStore = _arScanningManager.GetScanStore();
        ScanStore.SavedScan savedScan = scanStore.GetSavedScans()[0];

        // Select the processing quality for the pipeline
        Quality quality = Quality.Medium;
        GaussianSplatProcessor processor = new GaussianSplatProcessor(savedScan);

        try
        {
            Debug.Log("Processing splat...");
            GaussianSplat result = await processor.ProcessSplat(
                (resp) => { _progressSlider.value = resp.Progress; },
                default, quality, Format.SPZ
                //, "/path/to/export/"  // Uncomment this line to provide a custom export path
                );
            Debug.Log("Splat processing complete! " +
                "Num points: " + result.NumPoints +
                ", spherical harmonics degree: " + result.ShDegree +
                ", Positions: " + result.Positions.Length +
                ", Normals: " + result.Alphas.Length +
                ", Colors: " + result.Colors.Length);
        }
        catch (Exception e)
        {
            Debug.LogError("Splat processing failed: " + e.Message);
        }
    }
}
To process a specific recorded sequence instead of the first one, search the list returned by GetSavedScans for the desired ScanId.
Add the UI
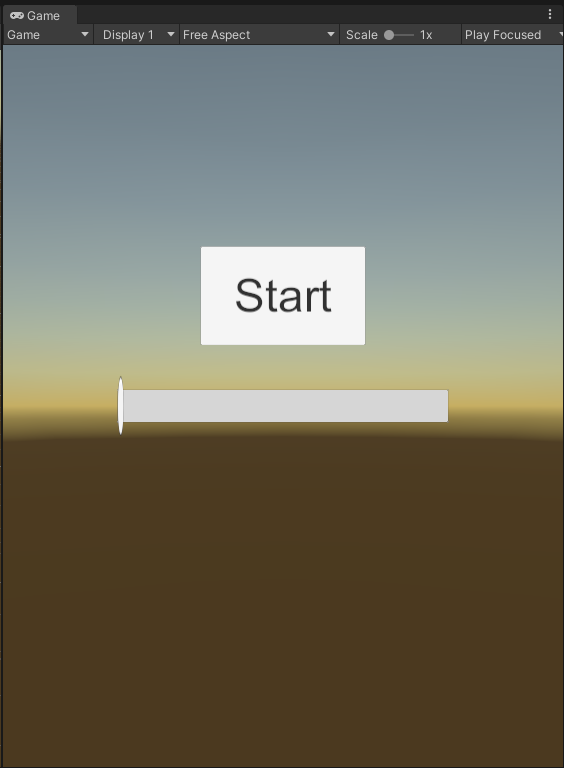
Add a start button and a progress bar to the scene.
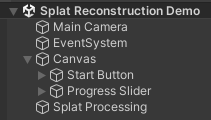
- Find your Canvas game object under the root object in the Inspector, or create one if it does not exist (Right-click → UI → Canvas).
- Under the Canvas, add a Slider (Right-click → UI → Slider) named Progress Slider and a Legacy Button (Right-click → UI → Legacy → Button) named Start Button.
- Adjust the position and size of the two UI elements to be visible in the scene.
Complete the Scene
Assign the serialized fields in the Splat Processing component with the AR Scanning Manager, button and slider.
Export to a File
Splats can export to Niantic Spatial's open source, highly-optimized SPZ format and to a splat-augmented PLY format, similar to Scaniverse.
To export the Gaussian splat to a file, provide the desired format and output path to ProcessSplat.
Calling ProcessSplat without an export format will return the raw data arrays without exporting to disk.
If exportFormat is provided without an exportPath, the file is saved to the SavedScan.ScanPath directory. See this document for the default scan recording paths. For example, running this in the Unity Editor on a Mac will save the file under /Users/{Username}/Library/Application Support/{Company Name}/{Project Name}/scankit/{Scan ID}/. Setting the Scan Path field of the AR Scanning Manager component will override the default scan recording location.
Try It Out
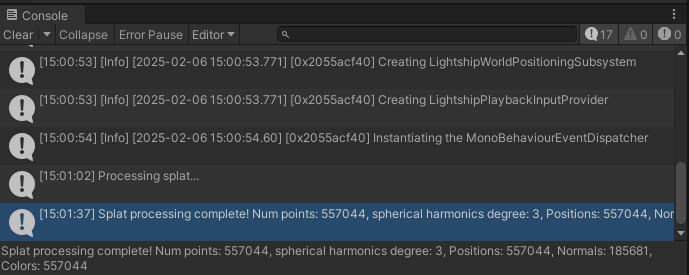
Run the scene and tap the start button to start the splat processing. Watch the progress bar increase, and check the console logs for information about the result. Look for your SPZ file at the default recording path for your platform, and try viewing it on the web.
Using smooth camera motion and capturing an area or object from many angles will result in a better Gaussian splat result.
The higher the quality setting, the longer the Gaussian splat will take to process.
Rendering a splat
While Niantic Spatial SDK does not provide a rendering solution for Gaussian splats in Unity, an open source solution is available. Aras Pranckevičius's Unity Gaussian Splatting project is a Unity plug-in that renders SPZ and PLY files.
Alternatively, to view your splat in a web browser, drop your SPZ or PLY file onto this webpage. Or, upload your SPZ file to a Niantic Studio project, and then drag it into the scene view.
Happy splatting!
Troubleshooting
The splat fails to export to a file
Splats can fail to export if the scan recording directory name has changed.
SavedScan directories are stored by their ID and created with 12-character alphanumeric names.
Renaming the directory before running reconstruction can cause the export task to fail.
To resolve this issue, avoid renaming the directory.